PATCH A SELECTED VIEW IN A SPHERICAL PANORAMA USING PTGUI This tutorial shows how to extract an arbitrary rectilinear view from a 360x180 equirectangular panorama image for editing in Photoshop and then merge it back into its original location. This is straightforward, but I will give detailed instructions for those who may be unfamiliar with PTGui's advanced features, so it may look much more complicated than it actually is. Templates can help to speed things up a lot and are discussed at the end.
|
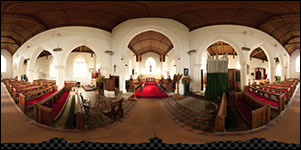
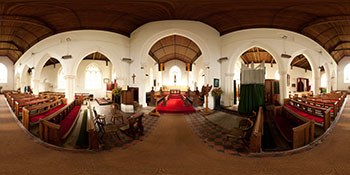
Load the panorama and select the view 1. Open PTGui and load in your 360x180 (uncropped) equirectangular image file. Ideally, work with 16-bit TIFF files throughout to preserve image quality, but you can of course use 8-bit TIFF or JPEG formats if you prefer.
2.
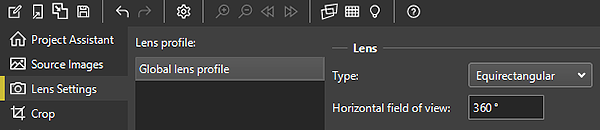
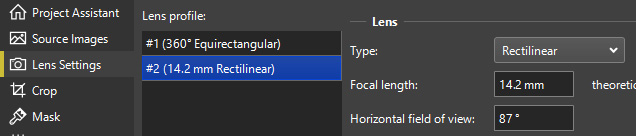
Select Advanced
mode
and go to the Lens
Settings tab.
4.
Go to the Panorama
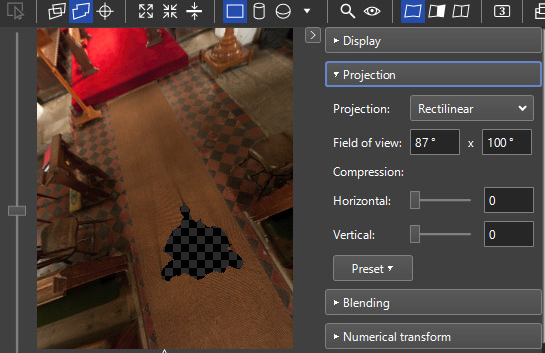
Editor window.
Select Rectilinear
projection.
6. Optional: for convenience edit the horizontal FOV to the nearest integer value. Then make a note of it for possible future use when the edited image is put back into PTGui. Do this even if just a simple integer value is showing as here, as the precise value may actually be something like 87.0204. If the external editing somehow loses the metadata in the file (not unknown!), PTGui will not be able to discover the true FOV value, so you will then need to manually enter the value noted here, which is simpler if it's an easy-to-remember integer value.
|
Generate the output file for editing 1.
Go to the Create
Panorama tab.
|
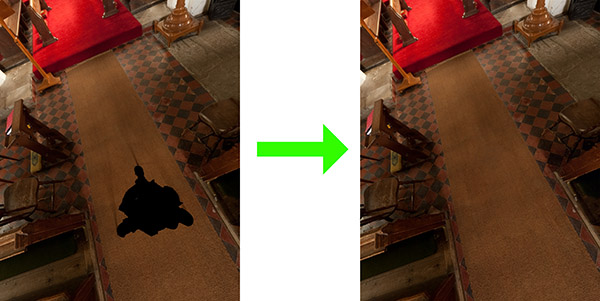
Edit the extracted view Use Photoshop or other editor to make the desired changes, taking care not to apply any edits that would affect the outer edges of the image. This is to ensure that the image will merge seamlessly with the rest of the panorama when it's put back into its proper place.
|
Insert the edited view into the panorama 1.
Goto the Source
Images
tab and right click to select the Add Images function (or use the
Images
menu item) to add in the edited image. PTGui should access
metadata containing the horizontal FOV of the image, i.e. the
value carefully stored away for reference earlier. Accept
the lens dialog that appears.
3. Go to the Panorama Editor window and select Spherical: 360x180 equirectangular from the Projection menu in the top toolbar.
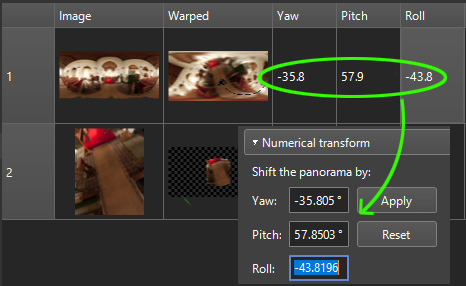
Now you need to shift the whole panorama back to its original orientation:
|
4.
Click the Numerical
Transform button
(or select it from the Tools
menu).
6. Click Apply to apply the transformation.
|
Generate the output panorama 1.
Go to the Create
Panorama select
fix
at
100% of optimum size again.
This should give the same dimensions as the original panorama. Why not let PTGui blend the two images? This may give a satisfactory result, but the blender might change areas of the panorama outside of the boundaries of the edited view, even though the edges match exactly. The changes are usually quite small and may not be noticeable, but to avoid these altogether, use the PSD output as described. It should always give you a perfect result.
|
Automating the process with templates The procedure described above can be speeded up considerably by using templates to apply settings to the PTGui project - particularly for common edits like the nadir and zenith areas. To do this, prepare two template files by saving the project at (1) the point where the extracted view is about to be generated (maybe "Patch - nadir extraction"), and (2) when the composite PSD file is about to be generated (e.g. "Patched - PSD composite"). The patching procedure then becomes: 1. Load in the equirectangular panorama file. 2. Use File->Apply Template to apply project file 1 ("Patch - nadir extraction"). 3. Set Maximum Size output and file name and create the view file. 4. Edit the view file in Photoshop. 5. Add the edited view file back into PTGUI on the Source Images tab. 6. Use File->Apply Template to apply project file 2 ("Patched - PSD composite"). 7. Set Maximum Size output and file name and create the PSD layered panorama file for flattening in Photoshop. You would need to prepare one pair of templates for patching the nadir and another pair for patching the zenith. I should also draw your attention to templates produced by Erik Krause ("Extract and insert floor or zenith image from an equirectangular panorama") at http://www.erik-krause.de/ttt/ .
|
John
Houghton |