PHOTOSHOP - EDITING WITH GRADUATED SELECTIONS
|
WHAT IS A GRADUATED SELECTION? A normal selection is often used to limit an image adjustment to a particular part (or parts) of an image. If you want to darken somebody's face, for example, you can draw a selection around the face with the lasso tool and then apply the levels or curves tool to darken just the selected area. With a graduated selection, you modify the effect of the adjustment so that it varies in magnitude across the selected area. This is achieved with a selection mask created using quick mask mode. You toggle in and out of quick mask mode using the button at the bottom of the tool box (two buttons are used in older versions of Photoshop).
|
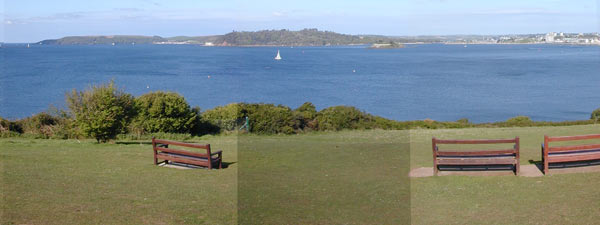
EXAMPLE Let's suppose we have a PSD layered file containing three overlapping images forming a panorama, but there is a problem with the central image where there is local darkening of the cliff top caused by cloud passing over the sun at the time the shot was taken:
|
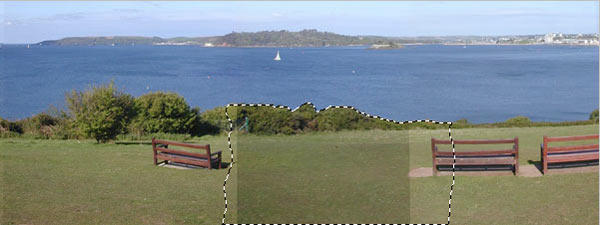
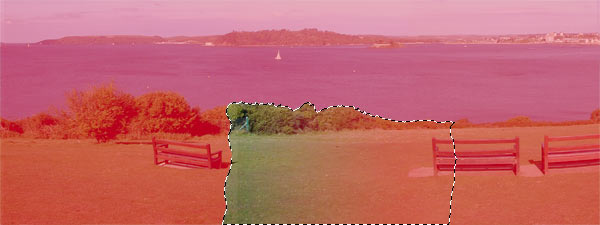
It looks like all we have to do is to first make a selection of the affected ground in the middle layer:
|
and then lighten it, using curves or levels. However, while it seems that the image can be made to match exactly on the left or on the right, it won't match on both sides at the same time. So let's adjust it (after selecting the middle layer in the layers palette) so that the right hand side exactly matches:
|
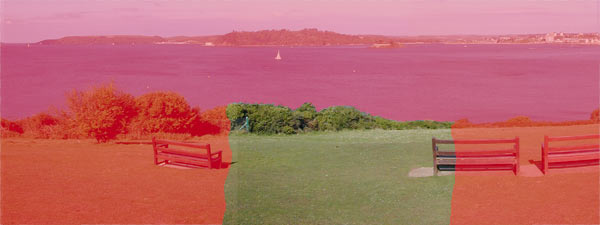
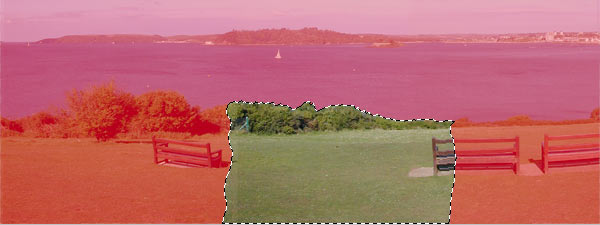
The left side is therefore still slightly dark leading to a just visible join. So we reactivate the selection just used (Select->Reselect), but then switch into quick mask mode using the button at the bottom of the tool box. A red mask appears corresponding to the selection. The red parts are the unselected parts of the image:
|
What's now needed is to fade the selection from left to right, so that the right hand side is red (unselected). For this, we can use the gradient fill tool. Check that the foreground and background colours are white and black, respectively. Bring back the previous selection with Select->Previous selection. This is to confine the gradient about to be created just to the "hole":
|
Now select the gradient tool and drag the cursor left to right (white to black) inside the selection, finishing where the right hand image starts:
|
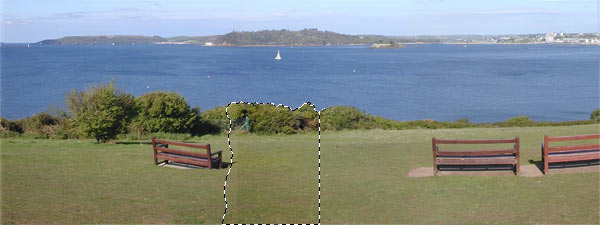
Switch out of quick mask mode using the button in the tool box and the graduated selection appears. It will appear to be only half as wide as you might expect, but that's because it only shows those parts that are in the range 50 to 100% selected.
|
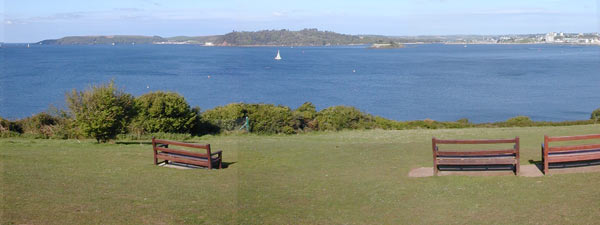
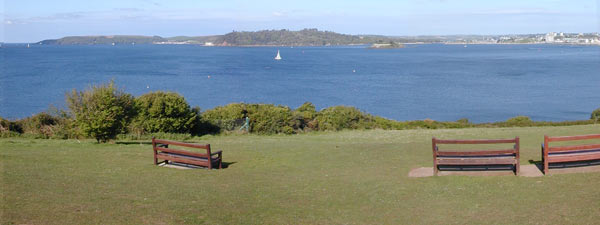
Now apply a curves adjustment to brighten the selection a tad in order to match the left hand side. The right hand edge will be unaffected. Then press ctrl/d to deselect. The result is a perfect match!
|
A couple of points to note: (1) The gradient can be drawn at any angle - not just horizontal or vertical. It doesn't have to be linear either. Sometimes a radial gradient will be more appropriate. The important thing to grasp is that a selection is handled internally much like a mask. When you switch into quick mask mode, you will find the selection mask held in a temporary alpha channel that is available in the channels palette. You can edit it in a variety of ways using the usual painting tools, just like a layer mask. (2) It's a good idea to temporarilly switch into 16-bit mode when making these adjustments to 8-bit images in order to minimise any banding effects.
|
John Houghton
|