HOW TO CREATE AN ALPHA CHANNEL TO MASK OUT AREAS OF AN IMAGE
|
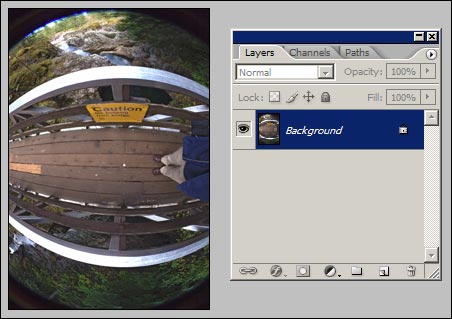
Stitched panorama images are often marred by the accidental presence of unwanted features. The tripod legs or photographer's feet, for example. While you can often deal with such problems in post-processing by cloning, a better solution is to remove such features from the original images before stitching and blending. With luck, there will be image data in the other images to fill the space vacated. Removal of the unwanted features is easily effected in Photoshop by means of an alpha channel mask - a close relation of the layer mask. If you aren't familiar with handling alpha channels, this is how to do it:
|
1. Open the image:
|
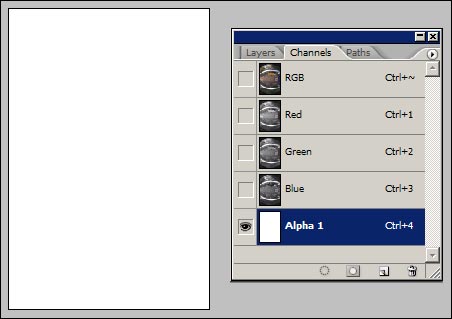
2: Hit ctrl + A to select the whole image, then go to Select->Save Selection...
Just hit OK.
|
3: A new channel will appear:
|
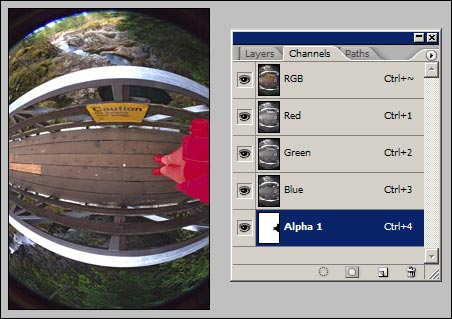
4: In the Channels palette, click
on the eye of the rgb channel to reveal the main image (keeping
the alpha channel selected). Now paint with a hard black brush over
areas that you want to exclude from the stitching. These will be
marked by a red overlay. The red overlay can be toggled on/off by
clicking the eye of the alpha channel. You can, of course,
use any of the painting tools and fill selections with black etc.
|
That's all you have to do. Finish
by saving to tiff format. (Ensure that the option to save alpha
channels is checked). If appropriate, you can drag
an alpha channel from the channels palette and drop it into an open
image window to copy a mask from file to file. |
John Houghton
|